Digital Development Processing is an interesting algorithm invented by Dr. Kunihiko Okano. It performs a combination of gamma stretching and unsharp masking intended to simulate the effect of photographic development on images. It is particularly effective at processing objects such as galaxies.
Depending on the Product Level, FFT filters may not be available for this command.
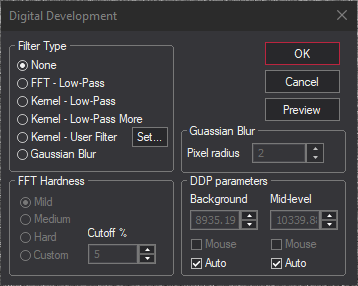
Traditional DDP processing as defined by Dr. Okano requires a low-pass filter setting. You can specify FFT filters and pre-defined or user-defined kernel filters. The mask filters work identically to those in the FFT Filter and Kernel Filter commands. The Set button also works identically to that in the Kernel Filter dialog.
For FFT Filters, the Cutoff field controls the strength of the filter. The Cutoff radius is entered as a percentage of the image dimensions. Entering a smaller value produces a stronger filter. A strong filter is useful for removing large-scale brightness variations, while a weak filter is useful for emphasizing fine detail.
When Gaussian Blur is selected, you can enter the Pixel Radius of the blur.
You can also set the Filter Type to None, preventing edge enhancement and reducing this command to a nonlinear hyperbolic stretch.
There are two other parameters that need to be set. Background should be set to the average background level in the image. This can be calculated automatically by selecting the associated Auto check box. Normally this is sufficient; however, the level can also be set manually or by using the mouse. Turn off the Auto check box to edit manually. To use the mouse, turn off Auto and turn on Mouse. Point the mouse at a background area in the image (not the preview) and click the left mouse button.
The Mid-level setting is more critical. It controls the "break point" in the transfer curve, and should be set to a middle level in the image. It can be calculated automatically, but using the Mouse input method is recommended. The best procedure is to activate Auto Preview mode, and click the mouse in various foreground areas of the image buffer (not the preview) until you are satisfied with the preview image. Note that the Mid-level setting must be higher than the Background setting.
This command sets the Screen Stretch for the result image to the Max Val setting. In some cases, this may make the image too dim; if so, simply adjust the screen stretch manually.