The Customize dialog is a dialog box containing four tabs which are used to customize MaxIm DL's menus and toolbars. It is invoked from the Toolbars submenu of the View menu, or from the context menu displayed when you right-click the right mouse button on unused (non-image-window) space in the MaxIm DL application window. While the Customize dialog is active, MaxIm DL works in a special "customize" mode that generally restricts the user input to customization commands only, although operations involving the Camera Control window, Observatory Control window, and the currently active command dialog [if any] are not affected.
Commands
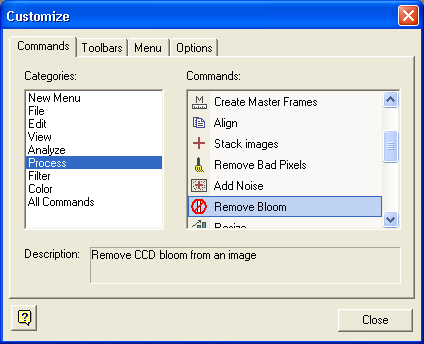
The Commands tab allows you to add, move, or remove commands from MaxIm DL's menus, submenus, and toolbars. This tab presents all customizable commands, divided into Categories by menu header; the customizable entries in each menu appear in the Commands list. For the special category New Menu, the list contains a single entry "New Menu", used to create a new menu item in the MaxIm DL application menu bar, a submenu within a menu dropdown, or a menu button on a toolbar. All Commands is a convenience that repeats all customizable commands in a single long list, and is useful for those occasions when you can't remember exactly where a particular command is found.
The customization procedure is the same, whether the target is a menu or a toolbar, and whether the entity being added is a command or a new menu:
Select the appropriate entry in Categories so that the item you want to add is shown in Commands.
Using the left mouse button, click and drag the item from the Commands list to its desired location. As you are dragging, a small grey rectangle representing the item is shown attached to the mouse cursor arrow.
When the mouse cursor is over a toolbar, a heavy black "I-beam" indicator appears between the two closest buttons, showing where the new item would be placed if you release the mouse button. On menus, which open automatically as the mouse cursor travels over them, and on vertically-aligned toolbars, the I-beam indicator is horizontal. Simply move the mouse so that the indicator is where you want the item to be placed and release the mouse button.
To move a button from one toolbar to another, or to a different position on the same toolbar, click and drag the button from its original location to its desired destination. Again, the mouse cursor indicates when the drop will be successful; however dropping an existing button or menu (as opposed to one from the Commands list in the Customize dialog) will remove it from the source toolbar or menu. Another way to delete an item is to use the right-click menu shown below.
To copy a button from a toolbar, follow the same procedure but hold down the Ctrl key. In this case the mouse cursor contains a boxed "+" to indicate that a copy operation rather than a move is in progress.
The same procedures work for menu items, and you can move or copy commands between toolbars and menus at will.
To change the appearance of a button or menu item, right-click on it. A pop-up menu appears:
Reset to Default restores the original text.
Copy Button Image copies the icon to the clipboard.
Delete removes the item.
Button Appearance... allows you to enter new button text. An ampersand in this string marks the character following as the hotkey, which is used in conjunction with the Alt key for quickly selecting that item.
Image sets the button to display an icon image (not available for menu items).
Text set the button to display only text.
Image and Text sets the button or menu to display both an icon image and text.
Start Group inserts a separator before the button or menu item.
Note: You cannot customize context (right-click) menus or fly-out menus in dialogs (menus that pop up when you click the ![]() button).
button).
Toolbars
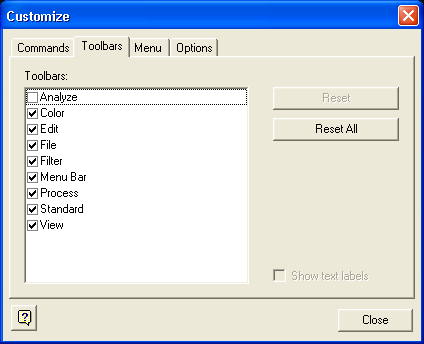
The Toolbars tab is an alternative way of controlling which of the eight MaxIm DL toolbars are displayed. Simply check or uncheck the entry for the specific toolbar. In addition, text labels can be displayed against all toolbar buttons in a particular toolbar by first selecting the specific bar in the Toolbars list, then clicking Show text labels.
This tab is also used to restore MaxIm DL's menu and/or toolbars to their original configuration, undoing any customization that has been performed. Select the bar and click Reset. You can also Reset All toolbars and the menu bar at once. In either case, a confirmatory dialog is displayed before the reset occurs.
Menu
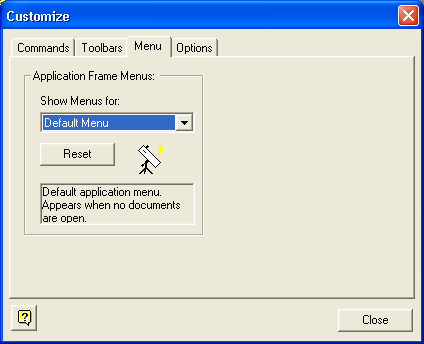
The Menu tab provides an alternative way of resetting the MaxIm DL application menu to its original configuration. Simply click Reset, then confirm that you wish to reset the Default Menu. [The Show Menus for dropdown is reserved for future use.]
Options
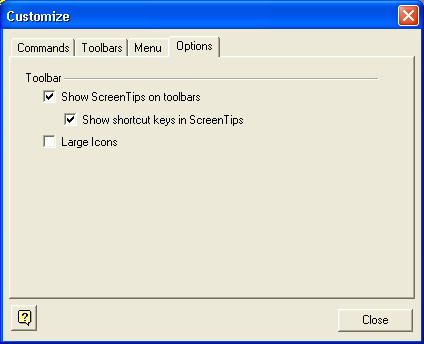
The Options tab allows control over the display of tooltips, explanatory tags that are displayed if the mouse is left stationary over a toolbar button for a brief time, and the way toolbar icons are displayed.
Click Show ScreenTips on toolbars if you want tooltips to be displayed. When this item is selected, you can also choose to Show shortcut keys in ScreenTips as a reminder. "Shortcut keys" are the keystroke combinations that activate the corresponding command without using the mouse.
Click Large Icons if you want toolbar icons to be displayed at double size. Although this takes more screen real estate, it can be useful when operating the program in low light conditions (i.e., with the monitor brightness turned down) or when gloves or mittens reduce manual dexterity.