The Batch Process Panel is a tool for recording and playing back sets of Operations. Some programs refer to this type of operation as a "macro".
As a simple example, suppose you want to calibrate an image, bin it 2x2, and then crop it to a certain size; you would simply perform those steps one at a time. Now suppose you wanted to do this 100 times; this would be very laborious. The Batch Process Panel allows you to do this quickly and easily. You can run a Batch on one image, multiple already open images, or images stored on disk.
The list of Operations stores not only what command you used, but also what settings were used. You can use the same command twice in a sequence with different settings.
Similar functionality is also available via scripting but Batch Process Panel does not require any programming knowledge.
Note that you cannot Undo a series of operations on an image. Only the last command can be undone.
Although an Open or Save operations can be recorded, these should normally be avoided. When operating on sets of files, opening and saving occur automatically via the Queue funciton.
Overview
The Batch Process Panel can be used to run a sequence of commands on a single file, or it can run the sequence on a set of images or files on disk.
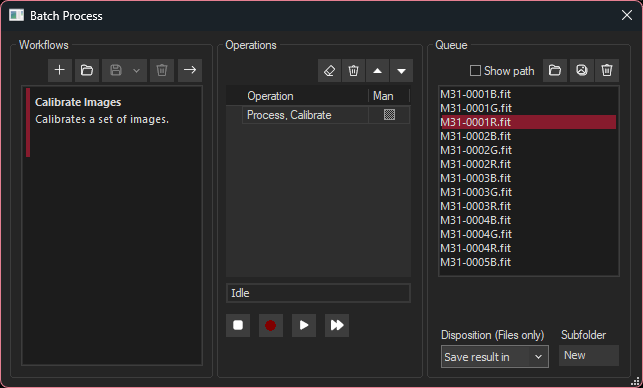
There are three sections to the dialog box:
We will talk about the Operations and Queue panels first, and circle back to the Workflows panel afterwards.
Operations
The center panel is used to create and edit a set of Operations, which can then be applied to one or more images.

 You can reposition a recorded command in the list by selecting it and then clicking the Move Up or Move Down buttons.
  To play back a Batch on multiple images, click the Play All button. You must first select images for your Queue; see below for instructions on setting up your queue.
 Note that you cannot close the Batch Process Panel while recording is in progress.
Queue
The Batch Process command can be used to perform the same sequence on operations on multiple images. To do this, first prepare your list of Operations as shown above, then set up a Queue of images to be processed. Once your Queue has been set up, you use the Play All button on the Operations panel to start processing.
 To select a set of image files from disk to process, click the Files button. This brings up the Select files to process dialog box. Select a group of files from disk using SHIFT-click or CTRL-click as needed. Click Open to add them to the Queue.
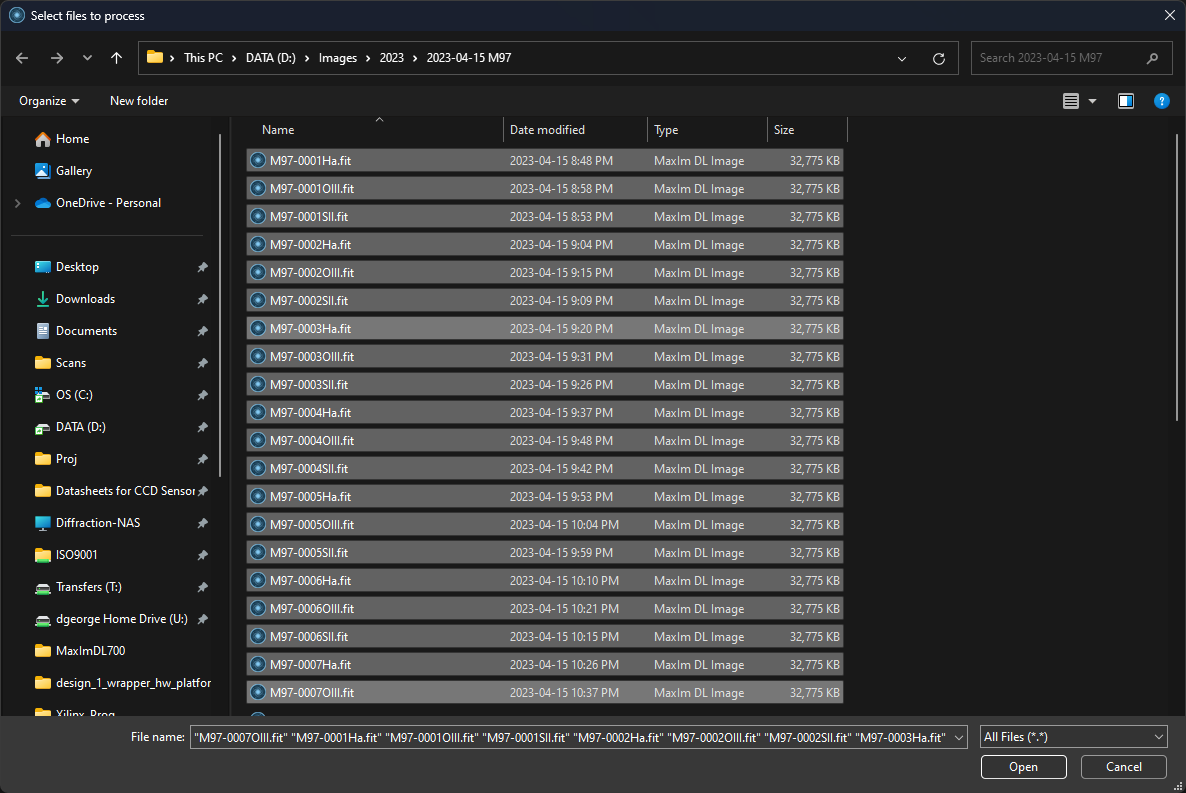
 If you would like to process images that are already open, click the Images button. The Select Images dialog will open. Select your images using SHIFT-click or CTRL-click as needed. Click Add All to add all open images. Click OK when the desired images have been selected. Open images will be tagged with [Image] in the Queue.
  Once your Queue is set up, click the Play All button under Operations. Each image will be processed in turn. Images in the Queue that have been processed will be crossed out. If you stop Play All and then restart, you will be asked whether to remove the struck out images from the list, or to reprocess them.
Workflows
A Workflow is a set of Operations that you can optionally create and reuse as needed. If you have image processing workflows that you have developed for various types of objects or observations, you can conveniently reuse these workflows whenever they are needed, without having to re-record them. The Workflows panel is used to load and save different workflow operations.
 To create a new Workflow, click the Plus button. This brings up the Workflow Properties dialog. Give the Workflow a Title, and optionally add a Description. The optional description allows you to add more detail that might not be obvious from a short title. Click OK. You can then record a sequence of Operations for this Workflow using the Operations panel, and then save it (see below).
  To load a saved Workflow from disk, click the Open Files button. Navigate to your file (.csq extension), select it, and click OK.
  To save a recorded Workflow, click the Save drop-menu icon. Save allows you to save the currently-selected workflow; Save As allows you to save it under a different filename.
  To run a Workflow, select it then click on the Arrow icon. Alternatively you can double-click on the Workflow. The Operations for the workflow will be loaded, at which point you can use Play or Play All to process images.