Start MaxIm DL and open the Camera Control Panel using Home Ribbon / Panels / Camera Control.
![]()
Move the Camera Control Panel to a convenient location on the screen. To do this, point the mouse at the title bar, click and hold the left mouse button, and drag.
The Setup tab should appear first; if it is not displayed click on the Setup tab near the upper right corner of the window.
Select Camera 1 by clicking on the associated Setup Camera button, and picking Simulator for the Camera Model. You can ignore the remaining settings for now. Click OK.
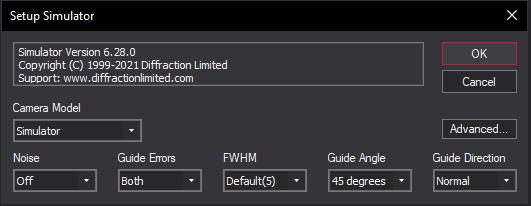
Now set up Camera 2, which is usually an autoguider. Click the autoguider Setup button, and set the Camera Model to Simulator. Set Noise to Off, Guide Errors to Both, FWHM to Default (5), Guide Angle to 45 degrees, and Guide Direction to Normal. Click OK.
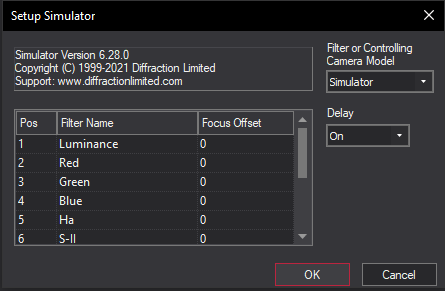
Next set up the filter wheel for Camera 1. Click the Setup Filter button, and set Filter or Controlling Camera Model to Simulator. Type in Red for Filter 1, Green for Filter 2, Blue for Filter 3, and Luminance for Filter 4. Click OK.
Now we are ready to connect to the equipment. Click Connect.
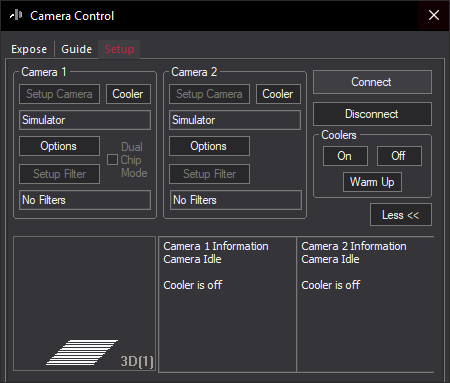
We now have two "cameras", one for use as the main camera, and the other for use as the autoguider. Normally you would configure your actual imaging and autoguider cameras, but the simulators allow you to try the controls at your desk.
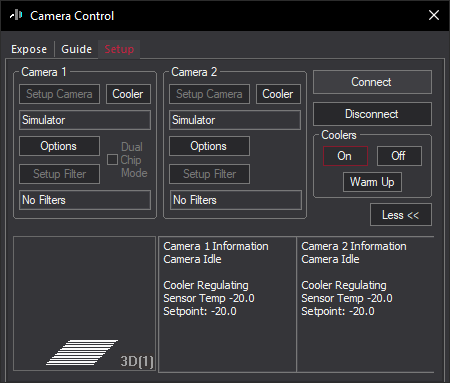
The Simulator camera has a programmable temperature. Click Coolers On to activate it, and then click the associated Cooler button to set the temperature. For each camera, set the temperature setpoint to –20 degrees C and click OK.
Once all of these settings are made they will be remembered. The next time you want to start MaxIm DL, just click the Connect button and then Cooler On.